


Stoma Care/Bag Emptying
Ostomy Care Supplies
A stoma care system consists of a skin barrier and a stoma bag. The skin barrier, made from skin-friendly materials such as gelatin,
pectin, and cellulose (hydrocolloid), ensures a secure fit thanks to a special adhesive layer.
- Stoma output is collected in an odor-proof plastic pouch.
- There are one-piece systems, in which the skin barrier and pouch are connected, as well as two-piece systems, in which the skin barrier and pouch are separate. The pouch can either be closed (colostomy) or have a drainage valve.
Emptying the Pouch/Changing the Ostomy Outfit
A closed pouch should be changed at least every 72 hours or when it is up to 50% full.
- A drainable pouch with a drainage valve should be emptied several times a day and changed after
the second day. - With a two-piece system, the skin barrier is also changed after three days
.
When to Change the Ostomy Outfit
The optimal time to change the ostomy care system is before a meal or two hours after eating.
- It is recommended to combine the change with a bath or shower. All necessary supplies should be prepared before the change.
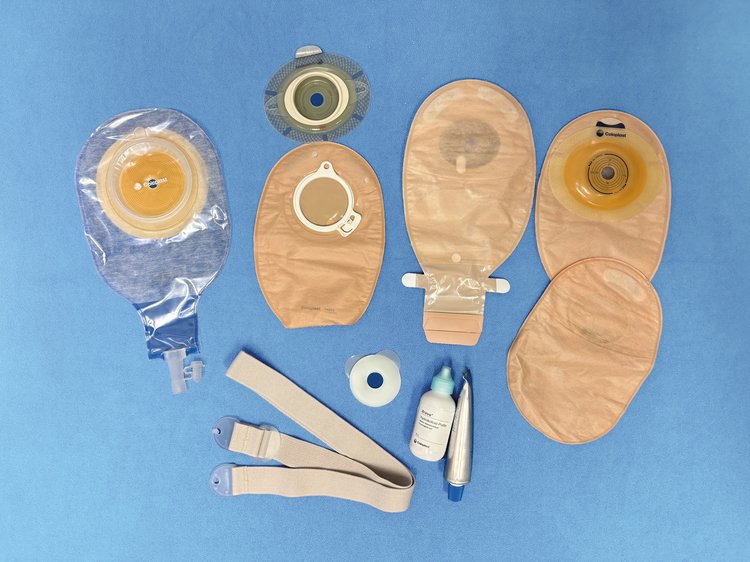
Ostomy Supplies
- Scissors, felt-tip pen, measuring template
- Stoma template
- New ostomy care
- Skin protection spray
- Five non-sterile non-woven compresses (three soaked in warm water, two dry)
- Adhesive remover
- Waste bags
- Additional products: Ostomy support garments, ostomy belts, adhesive rim extensions, disposable razors
- Supplies: Ostomy powder, ostomy paste, spacer rings, modeling strips
Additional materials
Aids such as ostomy powder, ostomy paste, skin protection rings, and modeling strips
are used for sealing and to compensate for uneven surfaces.
Storage of Ostomy Products
Ostomy products should be stored at room temperature and protected from heat, cold, high humidity, and sunlight, as these conditions can impair the adhesive properties of the skin barrier.
Changing the Ostomy Outfit
Instructions for Changing a Stoma Outfit
One-Piece System
Preparation
- Cut out the new ostomy appliance using the template
- Have any prescribed supplies ready (adhesive remover, powder, paste, spacer ring)
- Have three wet, non-sterile compresses (soaked in warm water) and two dry, non-sterile compresses ready
- Have a disposable razor ready if there is hair growth in the stoma area
- Have a disposal bag ready
Procedure
- Tuck the disposal bag into the waistband of the pants or underwear
- Peel off the stoma dressing from top to bottom; use your free hand to tighten the abdomen
- Discard the ostomy appliance into the disposal bag
- Clean in a circular motion from the outside in using the wet compresses
- Shave around the stoma if necessary
- After shaving, remove the shaved hair
- Dry the skin around the stoma with compresses
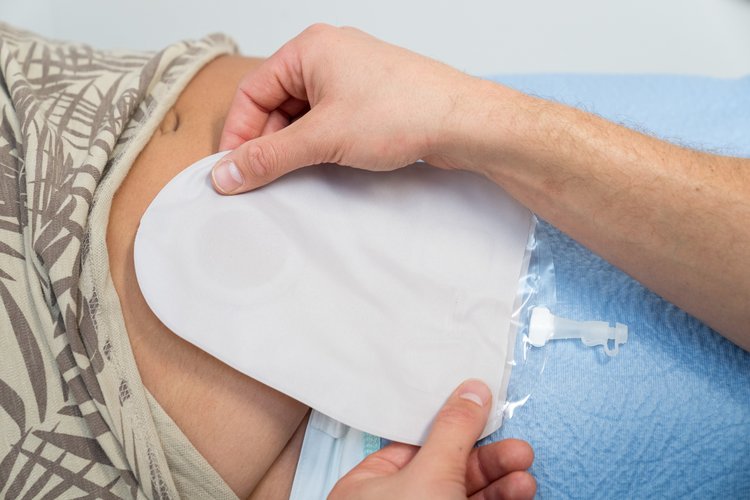
- Apply the new ostomy appliance starting from the lower edge of the stoma and press it down firmly (without creating wrinkles)
Two-piece system
Preparation
- Cut out the new ostomy pouch using the template
- Prepare any prescribed supplies (adhesive remover, powder, paste, spacer ring)
- Have three wet, non-sterile compresses (soaked in warm water) and two dry, non-sterile compresses ready
- Disposable razor if there is hair growth in the stoma area
- Have a disposal bag ready
Procedure
- Tuck the disposal bag into the waistband of the pants or underwear
- Carefully peel off the stoma appliance from top to bottom; use your free hand to tighten the abdomen
- Discard the stoma appliance into the disposal bag
- Clean in a circular motion from the outside in using the wet compresses
- Shave around the stoma if necessary
- After shaving, remove the shaved hair
- Dry the skin around the stoma with compresses
- Place the baseplate starting at the lower edge of the stoma and press it onto the skin (without creating wrinkles)
- Attach the pouch to the baseplate.
- Check to make sure the pouch is securely attached all around and that the closure is closed for emptying.